Simultaneous MIDI/Audio with Apogee ONE for iPad

The original Apogee ONE for Mac was USB audio compliant and could be made to work with the iPad with the iPad camera connector and a powered USB hub (see video).

I just tried the the same thing with the new Apogee ONE for iPad. It is USB audio compliant and does work natively with its own cable to the iPad, but I couldn’t get it to work with the USB cable through a powered hub in the same way as the original ONE.

Has anybody else managed to get it to work?

Disable Git in Eclipse

I use the excellent Source Tree as a visual Git client, and really dislike messages about versioning when I’m coding. Eclipse’s Git colours and overall intrusiveness seem to be particularly bad. I couldn’t find which plugin to remove but I did find the following settings:

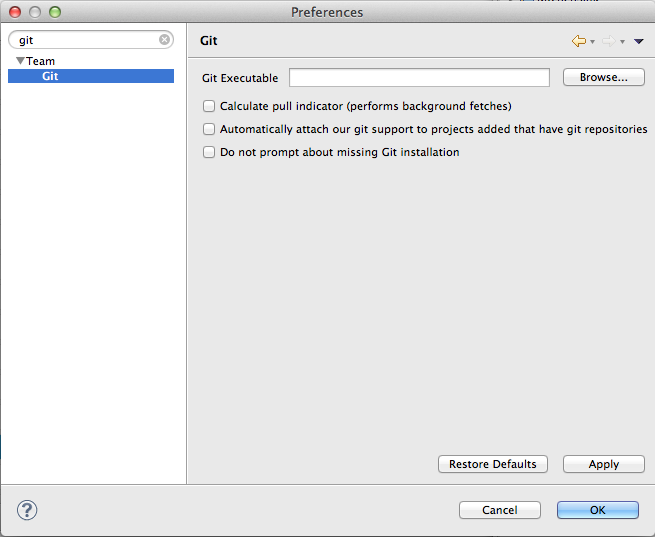
This setting will stop Eclipse from automatically attaching its Git functions:

disablegit

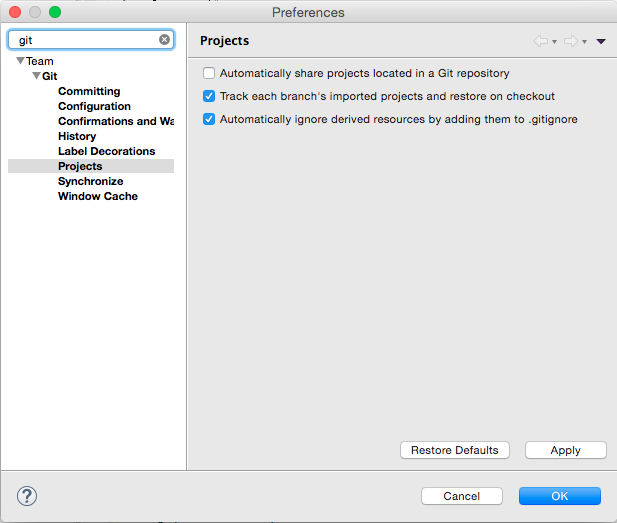
Update: Newer versions of Eclipse seem to use this setting:

disablegiteclipse

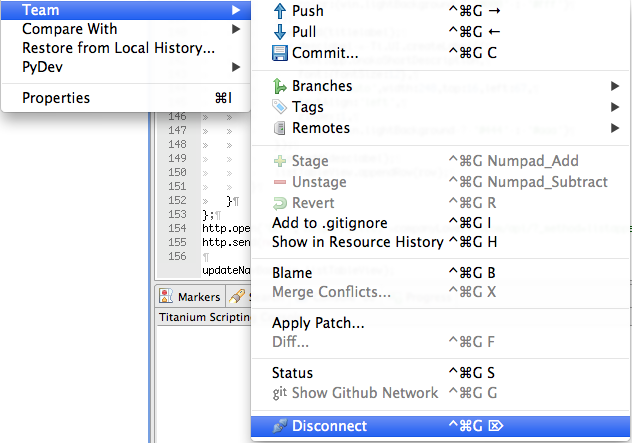
If you’ve already loaded some projects before disabling the above setting, you can disconnect those individual projects from Eclipse’s Git functionality here:

disconnectproject

iPhone Push Notifications with JavaPNS on Google App Engine

There have been several issues with getting JavaPNS working on Google App Engine. These included:
1) GAE didn’t support sockets or SSL
2) GAE doesn’t support signed jars, the BouncyCastle cryptography library is signed
3) GAE is transitioning to Java 7, and Java 7 has issues reading .p12 certificates

These instructions are for JavaPNS 2.2 and GAE 1.7.7, things may change on both fronts to make things either easier or harder.

1) GAE didn’t support sockets or SSL

With the arrival of GAE 1.7.7 sockets and SSL are now fully supported:
http://googleappengine.blogspot.com/2013/04/app-engine-177-released.html

2) GAE doesn’t support signed jars

Remove META-INF/MANIFEST.MF from the latest BouncyCastle jar or download my modified jar of BouncyCastle 1.48

3) Java 7 has issues reading .p12 certificates

a) Generate your .p12 certificate as per Apple’s instructions

b) Install Java 6 JDK

c) Use Java 6’s keytool to convert the .p12 to a .jks

keytool -importkeystore -destkeystore CERTIFICATES.jks -srckeystore CERTIFICATES.p12 -srcstoretype PKCS12

d) Configure JavaPNS to use the .jks format instead of .p12

boolean production = false;
String device = "DEVICE_ID";
String keystore = "CERTIFICATES.jks";
String password = "PASSWORD";
String message = "Hello JKS";

AppleNotificationServer jksServer = new AppleNotificationServerBasicImpl(keystore, password, ConnectionToAppleServer.KEYSTORE_TYPE_JKS, production);
PushNotificationPayload payload = PushNotificationPayload.alert(message);
PushNotificationManager pushManager = new PushNotificationManager();
pushManager.initializeConnection(jksServer);
List<PushedNotification> notifications = pushManager.sendNotifications(payload, Devices.asDevices(device));

Thanks to Palomino Labs Blog for the hints about Java and .p12 files:
http://blog.palominolabs.com/2011/10/18/java-2-way-tlsssl-client-certificates-and-pkcs12-vs-jks-keystores/

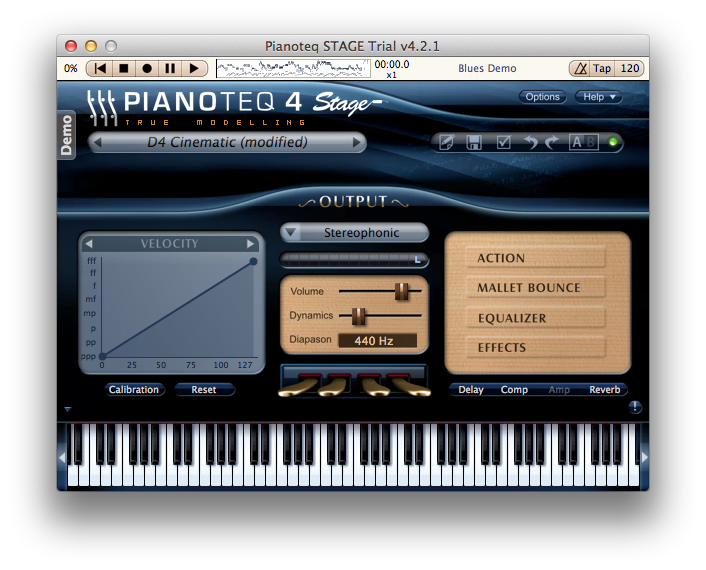
Midi Keyboard Velocity Curve Calibration With Pianoteq

I’ve dabbled on piano since I was about 6, and even though I’m still not very good, I do know that you simply can’t match the feel of a real live grand piano.

But…after 26 years of playing, I’ve finally found something that comes close. There are lots of great sounding piano modules / samplers out there, but Pianoteq with their velocity curve calibration, simply feels amazing.

Some of the sample based plugins like Imperfect Samples might sound more realistic, but without calibrating the velocity curve I can’t imaging getting the same feel as Pianoteq. (Pianoteq is great for live too with its low memory/cpu usage.)

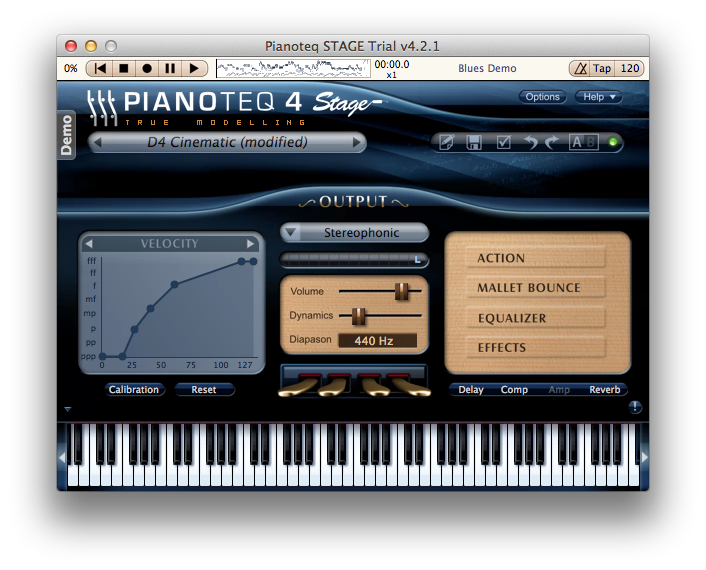
You’ll see from the difference in my calibrated and original curve below, I wasn’t even able to get close to playing a sensitive quiet note until I calibrated:

pianoteqcalibrated

pianoteq

List Apps To Update After Moving iTunes App Store Countries

I moved my iTunes account from one country to another recently as I am about to move. An annoying thing is iTunes doesn’t know how to update apps that you’ve downloaded from a different country, even though if you download it manually again you get the app for free. It works on the iPhone/iPad, so its really something they should fix in iTunes.

If you have OCD like me it can be very annoying to constantly have a (1) or something by the Apps, meaning you have Apps to update. I recently worked out where this information was stored, and came up with a relatively quick way to update these apps.

1) Open Terminal.app

2) Run the following command:

grep --binary-files=text -A 1 "<key>title" ~/Library/Preferences/*.iTunes.plist

3) Find those apps in iTunes and right click them -> “Show in iTunes Store”

4) Download the app again, if you bought it before it will say something like “This update is free because you have already purchases this app”.

5) After you’ve updated it once, it remembers that you’ve downloaded it from the new country and it can automatically find the update as per usual.

Note: Be careful because if an app has been removed from the App Store altogether, iTunes will sometimes redirect you to another app from the same publisher. This happened to me, I was redirected from the free (discontinued) app to the paid version, and thinking it was the same app I bought an app I didn’t mean to.

DynDNS via curl on Apple TV 2

1) Copy this script to /var/root/dyndns.sh

#!/bin/sh
if [ ${ip=$(curl -s ifconfig.me)} != ""$(cat ~/.dyndns.ip) ]; then
curl "http://USERNAME:[email protected]/nic/update?hostname=HOSTNAME&myip=$ip&wildcard=NOCHG&mx=NOCHG&backmx=NOCHG"
fi
echo $ip > ~/.dyndns.ip

2) Edit USERNAME, PASSWORD and HOSTNAME for your DynDNS account

3) Check it runs /var/root/dyndns.sh

4) Copy this script to /Library/LaunchDaemons/dyndns.plist

<?xml version="1.0" encoding="UTF-8"?>
<!DOCTYPE plist PUBLIC "-//Apple//DTD PLIST 1.0//EN" "http://www.apple.com/DTDs/PropertyList-1.0.dtd">
<plist version="1.0">
<dict>
<key>Label</key>
<string>dyndns</string>
<key>ProgramArguments</key>
<array>
<string>/var/root/dyndns.sh</string>
</array>
<key>StartInterval</key>
<integer>3600</integer>
</dict>
</plist>

5) Run launchctl load dyndns.plist

6) Run launchctl start dyndns

Notes:
– You can adjust the interval so that the script runs more frequently than every hour by modifying the 3600 seconds
– If you want to update multiple hostnames you can put them in a comma separated list
– For more information on DynDNS see:
http://dyn.com/support/developers/api/perform-update/

Fast Track Ultra 8R in Mountain Lion

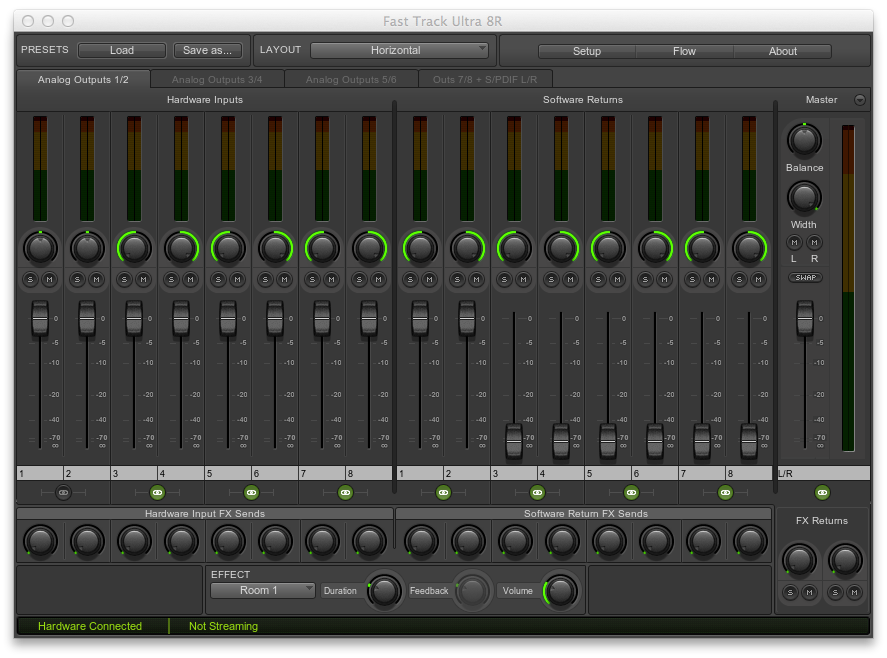
I’ve been having issues with my M-Audio Fast Track Ultra 8R on Apple OSX Mountain Lion (probably ever since Snow Leopard in fact). It would work the first time I boot up, but if I put my Mac to sleep or powered on and off the interface it would no longer be detected by the OS. I’d have to restart to solve the problem which was very annoying.

After not updating the driver for a couple of years I was very distressed when they had removed the old driver from the M-Audio site altogether. After some Googling though I found that they’ve transfered the product to be under their parent company Avid. They now have updated drives on their site:

http://www.avid.com/US/products/fast-track-ultra8r

It no longer has the sleep / power off problems and the new control panel is a nice update. It does seem almost impossible to contact to Avid support, but maybe you can still use M-Audio support?

Google DFP with Appcelerator Titanium

I’ve been using Appcelerator’s Titanium to streamline mobile development for Android and iPhone. They have a module for doing Admob ads but there Double Click for Publishers (DFP) module is only available to enterprise customers.

However, as long as you don’t need the DFP’s multiple sizes and just want custom campaigns with Admob backfill, you can use their current free Admob module.

Initial set up
1) Get Titanium’s Admob module here:
https://marketplace.appcelerator.com/apps/795?1803788439

2) In DFP go to your inventory and create mobile ad units for each size of ad you want to server in your app.

3) In your app set the publisherId to the id of your DFP adunit (normally it’s the publisher id from Admob)

var Admob = require('ti.admob');
var adunit = '/123/App320'; //Get this from your inventory in (2)
var adview = Admob.createView({
adBackgroundColor:'black',
primaryTextColor:'blue',
secondaryTextColor:'green',
publisherId:adunit,
width:320,
height:50,
bottom:0
});

Admob backfill
4) If you haven’t already set up an Admob account at http://www.admob.com and create your app to backfill DFP with.

5) Go to your orders and create a new order and line item:
– Enter the inventory sizes you want to use in your apps
– Since you probably just want to back fill almost always, set an end time far in the future
– Likewise set the quantity of your impressions to really high
– Set a low non-zero CPM value so that your ads actually show up
– When you click save, if you need to check “overbook” then do, it just means no one is viewing your ads yet

6) Add the inventory items you created in DFP previously (2)

7) For each ad size add an Admob creative entering the publisher id you created in (4)

Custom campaigns (optional)
If you want to put your own ads in or run custom campaigns for clients

8) Create a new line item in DFP. This can be under the same order you created before since you can use a different CPM value, or you can create a new order to keep things separate.

9) Again select the ad sizes and and adunits you want to use

10) Set the CPM, impressions and time period that your client is paying for

11) Add a new creative with the images or HTML that you want to display

* Note, unlike backfill with Adsense, in backfill with Admob DFP doesn’t know how much advertisers are bidding, so if you run custom campaigns you’re competing with the manual price you entered in (5), not the price that Admob advertisers are paying. However normally this isn’t an issue since if you’re doing custom campaigns they are hopefully bidding quite a bit higher than Admob for it to be with it. See the link below:

https://support.google.com/dfp_premium/bin/answer.py?hl=en&answer=2549435