Fishman Aura Spectrum DI Preset Footswitch Mod
I’m a big fan of the Fishman Aura Spectrum DI. If you don’t have something like the Taylor Expression system on your acoustic, it can vastly improve your plugged in sound, particularly for live situations. If you have a piezo on an electric or slimline guitar, it does the same, but because of the more “neutral” sound, I’ve found you can use it to give you all sorts of different acoustic sounds. Fender even do this with their Acoustasonic Tele.
Since using it to give multiple sounds on an acoustic guitar, something I’ve wanted to be able to do is switch presets with a footswitch. I had a look at the circuit and figured out a straight forward way to do this. Warning: This will void your warranty and I am not responsible for any damage to your pedal.
UPDATE Feb 2015:
I now recommend wiring up both sides of the DPDT switch and wiring to pins 3/4 instead of pins 1/2. The reason for this is that it puts on the “preset” slots at the end (13-16), and means you only loose 4 slots. This makes more sense to me because I set the presets all the same (my main sound) and that set an alternative on the dial. If you like to set up pairs of sounds with a different preset on each one, then use my original mod of just soldering a single side of the DPDT to pin 1.
Update Oct 2024:
I’ve found a 3PDT switch that fits if you sand down the sides a bit. This means you only lose 2 preset slots 15/16 rather than 4. Switch is here:
https://lovemyswitches.com/taiway-3pdt-latched-foot-switch-low-profile-solder-lugs/
How I did it:
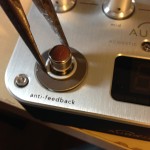
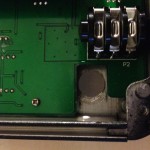
1. Use pliers to remove the ring around the anti-feedback switch. The anti-feedback switch is a momentary switch and we need a latching one.
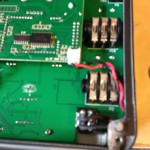
2. Use hex keys to remove the base of the pedal, and remove the battery clip as you do.
3. Locate the rear of the anti-feedback switch and remove the clip for that too.
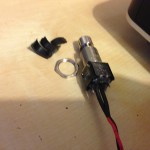
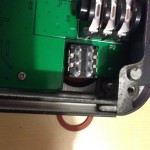
4. VERY CAREFULLY use a sharp craft knife or scalpel to cut down each side of the switch to remove the plastic washer that stops you removing it. I found if I bent the switch to one side while I did this it made it easier. I’ve owned two versions of the Fishman Aura DI, and the older ones didn’t have this, so you could just remove the switch, if you do you’re lucky, this step took me a couple of hours!
5. Insert the new switch, I used some rubber washers to space it. Alpha’s small DPDT footswitches fit, and appear to be the same as what Fishman are using. They’re available on eBay: http://www.ebay.co.uk/itm/131175360378
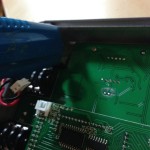
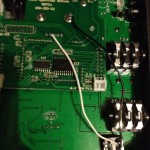
6. Connect one pin of the switch to the 2nd pin of the 16 position rotary encoder (bit 1), and another pin to ground.
– There are multiple ground points, use the one that’s easiest, but I used the ground for the rotary encoder.
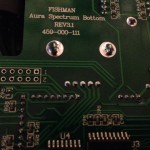
– From left to right the pins of the rotary encoder are: Input, bit 1, bit 2, bit 3, bit 4
How it works:
The 16 way preset switch is basically a rotary encoder counting from 0-15 in binary. As it counts, it connects each of the 4-bits to ground. We’ve connected the switch to bit 1, which means that it will increase any of the off positions (in binary even) by 1. So it will switch between preset 1 and 2, or preset 3 and 4, 5 and 6, etc. If you are on an even position (in binary odd), bit 1 is already grounded so the switch does nothing, i.e. positions 2,4,6,8 won’t be switched.
Notes:
– The original Aura Imaging Blender seems to have had preset footswitches built in:
http://www.fishman.com/product/aura-imaging-blender-discontinued
– If you could get access to the other side of the PCB, you could disconnect the input to the rotary encoder and switch that. This would give you a better switching system, where you always switched between preset 1, and what you had set on the preset dial. I didn’t feel confident disassembling things that much though, so elected for the simpler system.
– Here’s a list of my favourite Fishman Aura patches:
https://docs.google.com/spreadsheets/d/1FN8WMgKAJQHMKjTJkxhZzQQYS5DTSRZGXKffRXjX6PA
